


Gear Up for Heating Season: Top 10 Tips to Navigate the Cold Without a Hitch!
Posted by Radiators 4u on 27th Aug 2024

As the autumn leaves start to fall and the crisp morning air hints to the impending cold, homeowners around the world know it's time to think about heating. Winter can be a daunting season for the unprepared home. Bitter cold outside shouldn’t mean having to bundle up indoors.
In fact, with the right preparations, your home can be the cozy sanctuary you need it to be during the chilliest months of the year.
But where do you start? Whether this is your first winter in your new home or you've weathered many snowy seasons, there's always something to do to improve your home's warmth and energy efficiency.
Here we've curated a list of ten essential tips to help you prepare your home for the heating season, ensuring you and your loved ones remain snug and toasty all winter long. Dive in and discover how to make the most of your home's heating capabilities!

If you have a combi boiler and haven’t used your heating in a while, then it is worth checking your boiler pressure.
Your combi boiler's pressure is integral to its efficient operation. Too low or too high, and you might find yourself without heat or hot water at the most inopportune time. Fortunately, monitoring and adjusting the pressure is a straightforward task:
- First, locate the pressure gauge on your boiler, typically a dial with numbers ranging from 0 to 4. Ideally, when the boiler is off and cooled, the pressure should sit between 1 and 1.5 bars. If it's below this range, you'll need to top it up.
- To do so, locate the filling loop, usually a silver or grey flexible hose with small valves at both ends. Ensure both ends of the loop are securely attached to their respective valves. Then, gently open the valves to allow cold water into the system.
- Keep a close eye on the pressure gauge and once it's within the 1 to 1.5 bar range, close the valves tightly.
- If you're unsure about any step or notice continual pressure drops, it's recommended to consult a professional. Regularly checking and maintaining the right pressure ensures your combi boiler operates efficiently and lasts longer.
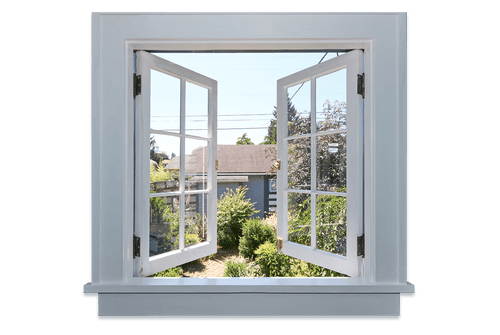
Before using your heating for the first time in a while, it is a good idea to air your home out.
This essentially requires you to open all your windows and doors, remove any obstructions from your radiators and then heat your home. This combined practice of heating the house with the windows and doors open will allow any dust that will be dislodged by thermal currents to be blown out of your home and avoid musty smells and dust allergies.
We also recommend vacuuming below your radiators to gather any dust accumulation. It is important to do this step before it is too cold to feasibly open all your windows.
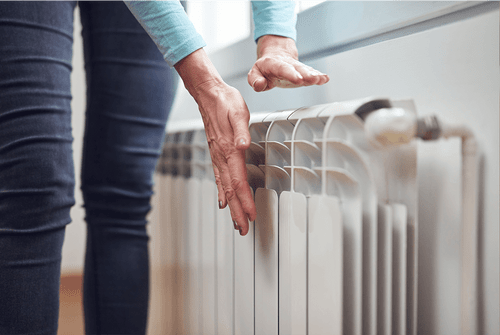
Many homeowners have been caught off-guard on a chilly evening, only to discover their heating is malfunctioning or not efficient enough.
- Start by setting your thermostat to a comfortably warm temperature to see if the system kicks in promptly.
- Listen for any unusual noises or indications of a struggle. Ensure your radiators are heating up evenly:
- If you have any cold radiators you may need to balance your heating system or adjust your TRV
- If you have cold spots on a radiator (at the top) you may need to bleed the radiator.
If any issues arise during your test run, it's better to address them early on. By doing so now you'll save yourself from discomfort, longer lead times and potential higher costs of urgent repairs during peak winter demand.
Once you have successfully warmed your heating system for at least 15-20 minutes it is worth rechecking your boiler pressure has remained stable (if your system is still warm you may find that the pressure has increased slightly - this is normal).
If your pressure has dropped it may indicate a leak or open bleed valve somewhere.
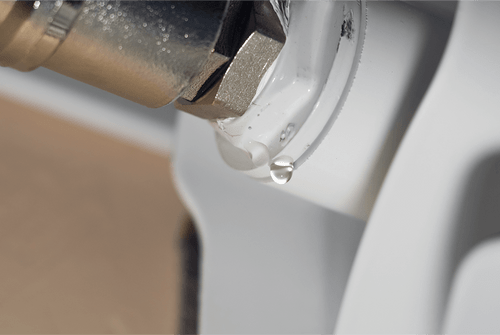
Now is a good time to check your radiators for leaks, leaks can occur with older pipework or if pipes and valves have been knocked throughout the summer.
Detecting leaks in your central heating system is crucial to ensure its optimal performance and longevity. Here's how to check for leaks:
Visual Inspection: Begin by conducting a visual inspection of all radiators, pipes, valves, and the boiler. Look for any signs of moisture, rust, or water staining. Damp patches on walls, floors, or ceilings near the heating system can also indicate leaks.
Pressure Gauge: Monitor the pressure gauge on your boiler. If the pressure consistently drops after you've topped it up, it might be indicative of a leak somewhere in the system.
Listen: Sometimes, you can hear the leak. In quiet conditions, listen closely to your radiators and pipes for a hissing sound, which can indicate escaping air or water.
Radiators: If a radiator isn't heating up uniformly (cold at the bottom and warm at the top), it might not necessarily be a leak, but it's worth investigating further.
Check the Boiler: Look beneath your boiler for any signs of water pooling, which can be an obvious sign of a leak.
Dye Testing: This is a professional method where a dye is introduced into the system, which then gets circulated. If there's a leak, the colored dye will seep out, making it easier to locate.
Regular Maintenance: Always ensure your central heating system is serviced annually by a qualified professional. They can spot potential issues before they escalate and lead to visible leaks.
If you suspect a leak, it's vital to address it promptly. Leaks can cause structural damage, increase your energy bills, and reduce the efficiency and lifespan of your heating system. If you're unsure or can't locate the leak, always consult with a heating engineer or professional.
If you do discover a leak, now is the time to contact your heating engineer before they become overwhelmingly busy in peak heating season.

Once you have tested your radiators and checked for leaks, ensure you have suitable boiler pressure and then bleed each radiator in your home.
Why do you need to bleed radiators?
Over time, air can become trapped in your radiators, acting as an unwanted barrier to the free flow of hot water within the system. When this happens, you might notice that your radiator is warm at the bottom but cold at the top. This trapped air not only results in uneven heating but also forces your boiler to work harder, leading to decreased efficiency and increased energy bills.
Bleeding your radiators releases this trapped air, ensuring that the entire radiator heats up uniformly. By routinely checking and bleeding your radiators, you ensure optimal heating performance, reduce unnecessary strain on your boiler, and promote energy efficiency in your home.
We have prepared a full step-by-step guide to bleeding your radiators here.

If you find that your radiators are not consistently warm from room to room then you may need to balance your heating system.
Balancing radiators is an essential process in ensuring every room in your home receives an even and consistent amount of heat. Radiators situated closer to the boiler tend to get hotter quicker than those farther away. If your radiators aren't balanced, you might find that one room becomes toasty warm while another remains chilly, even if both radiators are on the same setting.
When we speak of "balancing," we're referring to the adjustment of the flow of hot water distributed to each radiator, ensuring they all heat up at a similar rate. This process doesn't just enhance your comfort but also promotes efficiency. When all radiators are heating evenly, the boiler doesn't have to work overtime to compensate for cold spots in your home, leading to reduced energy consumption and, subsequently, lower heating bills.
Moreover, balanced radiators reduce the likelihood of wear and tear on your heating system, extending its life and preventing the need for premature replacements or repairs.
Check out our step-by-step guide to balancing your radiators.
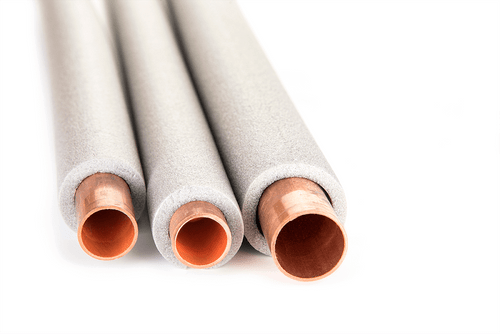
As the weather drops colder, it is a good idea to insulate your heating pipework.
There are a number of benefits to insulating your heating pipes:
Energy Efficiency: Heat loss from pipes means your heating system must work harder to maintain the desired temperature, leading to increased energy consumption. Insulated pipes can retain the heat, ensuring that hot water stays hot as it moves from the boiler to radiators or taps, reducing the energy required to heat your home.
Preventing Frozen Pipes: In cold climates, uninsulated pipes can freeze. When water inside a pipe freezes, it expands, potentially causing the pipe to burst, leading to water damage and costly repairs.
Reduced Condensation: Insulating cold water pipes can prevent condensation. This is especially important in areas with high humidity, as dripping pipes can contribute to moisture problems, potentially damaging your home or encouraging mould growth.
Safety: Hot pipes, especially those accessible to children or pets, can be a burn hazard. Insulation can reduce the surface temperature of these pipes, making them safer to touch.
Noise Reduction: Insulation can act as a sound barrier, reducing the noise from flowing water or expanding and contracting pipes.
How to Insulate Pipework?
Choose the Right Insulation: Pipe insulation commonly comes in foam or fiberglass sleeves. The size and type you need will depend on the diameter of your pipes and their location.
Measure and Cut: Before you begin, measure the length of the pipes you'll be insulating. Using a utility knife, cut the insulation sleeves to the required lengths.
Install: Most foam insulation sleeves are designed to fit around the pipe easily and come with a slit down one side. Simply open the sleeve at the slit, fit it around the pipe, and then seal the slit. Some sleeves come with self-adhesive edges, while others may require tape or specific adhesive to seal.
Secure the Insulation: In areas where the insulation might be disturbed or fall off, you can secure it using cable ties, duct tape, or specialized clips.
Elbows and Curves: For bends and joints, you can either cut and shape the insulation to fit or purchase pre-formed bends.
Outdoor Pipes: For pipes exposed to external elements, ensure that the insulation is weather-resistant or consider adding a weatherproof layer on top.
By insulating your pipework, you're not only safeguarding your home against potential problems but also making it more energy-efficient and environmentally friendly. It's an investment that often pays for itself in reduced energy bills and increased peace of mind.
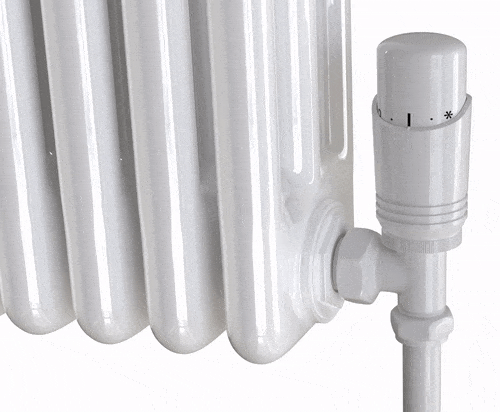
Thermostatic Radiator Valves (TRVs) are designed to regulate the flow of water to a radiator based on the ambient room temperature. They don't directly set a radiator to a specific temperature like a room thermostat; rather, they control the temperature in individual rooms by adjusting the heat output of each radiator.
Discover how correctly using your TRV’s can make a big difference to your energy costs.
Understand the Settings: TRVs typically have numbered settings, often ranging from 1 (coldest) to 5 or 6 (hottest). Some might also have a frost protection setting, symbolised by a snowflake. The exact temperature each number corresponds to can vary between manufacturers, but as a general guideline:
- 1 could be around 12°C
- 3 (usually the midpoint) around 20°C
- 5 or 6 might be 28°C or above.
Initial Setup:
- Start with all TRVs set to the midpoint (usually around 3).
- Adjust according to comfort. If a room feels too cold, turn the TRV up by one setting, and if it feels too warm, turn it down by one.
- It's advisable to make small adjustments and wait for a few hours to evaluate the change before adjusting further.
- Ensure that TRVs are not obstructed by furniture or curtains and are away from heat sources, such as lamps or TVs. This ensures they get an accurate reading of the room's ambient temperature.
Seasonal Adjustments: During colder months, you might want to turn the TRVs up, while in the milder seasons, turning them down or off can help save energy.
Bedrooms vs. Living Areas: Bedrooms usually don't need to be as warm as living areas. Setting bedroom TRVs to a lower setting compared to living rooms or kitchens can help ensure a comfortable sleeping environment and save energy.
Here is a handy guide for typical temperatures by room type:
| Room | Temperature | |
|---|---|---|
| Living Room | 20°C - 22°C | |
| Bedrooms | 16°C - 19°C | |
| Children’s Bedrooms | 16°C- 20°C | |
| Office | 20°C - 22°C | |
| Corridors & Entryways | 15°C - 18°C | |
| Bathroom | 20°C - 22°C | |
| Kitchen | 18°C - 20°C |
Rooms Not in Use: If there's a room that's rarely used, consider turning its TRV to the lowest setting (or the frost protection setting) to prevent unnecessary heating.
Setting your room thermostat correctly during colder weather can help maintain a comfortable living environment while ensuring energy efficiency. Here's how to set your room thermostats appropriately for chilly conditions:
Determine Your Comfort Zone: Start by identifying a comfortable temperature for your living areas. For many people, this is typically between 18°C (64°F) and 21°C (70°F). Remember, it's usually more energy-efficient to wear warmer clothing indoors rather than turning up the thermostat too high.
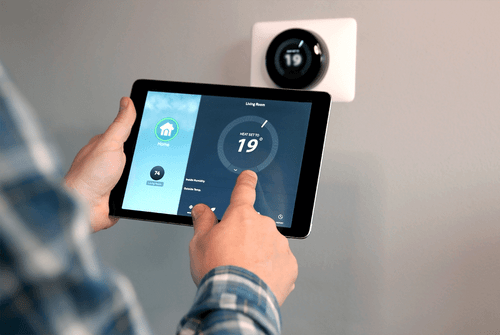
Utilize a Programmable Thermostat: If you have a smart or programmable thermostat, set schedules according to your daily routine:
- Morning Warm-Up: Schedule the heating to come on about 30 minutes before you wake up.
- Daytime: If the house is empty during the day, lower the temperature a few degrees to save energy.
- Evening: Have the heating come on 30 minutes before you arrive home.
- Night: Lower the temperature slightly for bedtime. Your body generally doesn't require as much heat when sleeping, especially if you use warm bedding.
Some smart thermostats also allow you to only heat the home when you are in by utilising your smart phones GPS.
Isolate Unused Rooms: Close the doors to rooms that aren't frequently used and consider turning down or turning off the heat in those areas. However, ensure that these rooms remain above freezing to prevent any potential pipe damage.
Check Thermostat Placement: The thermostat should be placed in a central location away from direct sunlight, drafts, doorways, or other heat sources. This ensures it gets an accurate reading of the home's ambient temperature. It is also recommended to make sure the room with the thermostat has the TRV set to fully open to avoid overheating your entire home.
Avoid Overheating: It's essential not to overheat your home. Not only can this lead to increased energy bills, but consistently high indoor temperatures can also have negative health implications, particularly for the elderly or very young.
Remember, every home and individual is different. It might take a bit of experimentation to find the perfect settings that balance comfort, energy efficiency, and cost. Adjust, monitor, and reassess as needed to ensure you're getting the best out of your heating system during the colder months.

As the adage goes, "prevention is better than cure," and this couldn't be truer when it comes to your home's heating and plumbing systems. As colder months approach, plumbers and heating engineers often find their schedules packed, attending to a surge of service calls and emergency repairs.
Many homeowners, recognizing the importance of a functioning heating system during the chilly season, rush to secure appointments. If you delay, you risk facing longer wait times or not finding a slot that aligns with your schedule. To ensure your heating system is in tip-top condition and to preempt any plumbing issues before they escalate, it's wise to book your plumber and heating engineer in advance.
By doing so, you'll not only enjoy the peace of mind that comes with a well-maintained home but also sidestep the potential disappointment and inconvenience of last-minute scrambles in the busier months.
Customer Favourites:
Best Selling Thermostatic Radiator Valves:
- TRV Valves

- TRV Valves

- TRV Valves

- TRV Valves

- TRV Valves

- TRV Valves

- TRV Valves

- TRV Valves

- TRV Valves

- TRV Valves

- TRV Valves

- TRV Valves

